|
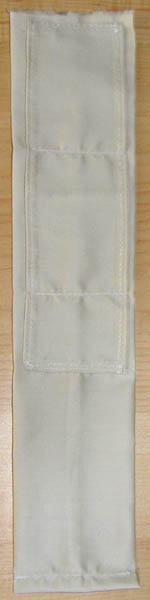
Chikara nuno "Chikara nuno" literally means "strong fabric", for kimono it refers to a collar adjustment that is attached to the juban collar. There are three adjustment loops through which a koshihimo (sash) is tied to make the collar higher or lower on the neck (the higher the loop used, the more nape shows). To make a chikara nuno like the one pictured, but with a longer lowest loop (mine is a bit shorter than usual, as I
"tailored" it for myself), you'll need a piece of fabric 50cm long and 40cm wide, as well as basic sewing skills.
Cut the following pieces from your chosen fabric: Fold the larger strip in half lengthwise, sew the raw edges together with a 1cm seam allowance. Turn right side out and iron flat with the seam down the center. Hem remaining raw edges at ends. Hem the raw edges of the smaller strip lengthwise. Fold down one raw edge of the smaller strip, place this edge about 1cm from the end of the larger strip. This will be the top. (Use photo for reference if needed.) Make sure the edges are parallel, then sew it on. Don't sew the smaller strip on lengthwise - only sew across its width. Measure 10cm from the top edge, sew across. This will form the top loop. Measure 20cm from the top edge and sew across - this forms the middle loop. To make the lowest loop, measure 30cm from the top and sew, having folded under the remaining raw edge. |
Next: Preparing to sew on the chikara nuno |
|